Tuesday, 29 April 2014

Happy Early Birthday Dad!

Tomorrow is my dad's birthday, so it is only right to dedicate a special post to him today.  I will start off by sharing a few favorite stories:

1.  The winter that my mom went back to work after having me, my dad stayed home to look after me (one of the perks of being a farmer).  I don't remember this but have heard the story many times from my mom.  Dad bought a little trike motorcycle for me (foot pedalled of course) and would push me around on it with a broom handle.  As I say, I don't remember this but I am certain that I thought it was the coolest thing at the time.


2.  When my sister and I were little, Dad was the absolute best for playing with us.  I will start this off by saying that my dad is a true man's man.  He likes cars, motorcycles, farming, football - your typical manly guy.  But if Austin and I wanted him to play with us, he always would no matter what.  On Christmas when we would get new Barbies and wanted daddy to play, you can bet that he would.  Austin and I sure got lucky with such a great man as our father.


3.  I mentioned before that Austin and I would spend a good chunk of our childhood summers in the feild with Mom and Dad - this gave us nearly endless hours to talk their ears off (can you imagine how many "why" questions were asked... sorry about that Dad!).  But Dad never lost his patience (with us anyway - broken down machinery was a whole other issue, haha), he would just answer our questions and tell us more about whatever we wanted to know.  I learned so much from him at a young age because he talked to me like I wasn't a little kid.  I really appreciated that, and I still do.


Dad is one of the strongest men I know.  He has gone through some really hard times but - resilient as always - he comes back from them even stronger.  He has loved my mom, my sister and me with his whole being; and in doing so, taught me what the man I marry should be like.  When I look at him, I am filled with pride and love.  I take it as the highest compliment when someone calls me "Little Sam", comparing me to him - as they often do.


I hope you aren't too sick of country song lyrics yet because here are a few that remind me of my dad.  "Strong" by Will Hoge is featured in Chevy Truck commercials, so you may have heard this one before.

He'll pick you up, won't let you down.
Rock solid inside out.
Somebody you can trust,
Steady as the sun.
He's strong.


Happy birthday Dad!  I love you so much.

Saturday, 26 April 2014

Making a House a Home and a Quick Embroidery Pattern

I am back at the farm for a short while before Term 3 of school starts and I have made it my mission to decorate a few spaces.  It is time to take our home from a bachelor pad to looking like a place where an actual female lives.  I got some of the things for our wedding but I managed to pick up a lot of stuff at a local store that carries some beautiful home accessories.


Our microwave doesn't have a timer on it so I picked up this cute Matryoshka Doll kitchen timer.  The succulent plant was a house warming gift from a friend - surprisingly, I have managed to keep it alive for over a year now!


I love owls, they are probably one of my favorite animals (other than cats of course).  When I saw this guy I knew I had to have him.  He is supposed to be for the garden but I though he looked nice on one of our end tables paired with some soy candles and another succulent.


I picked up this shelf for our bathroom a couple of weeks ago and Brett just got around to hanging it up a few days ago (house stuff goes to the very bottom of the list for a farmer in April!). 


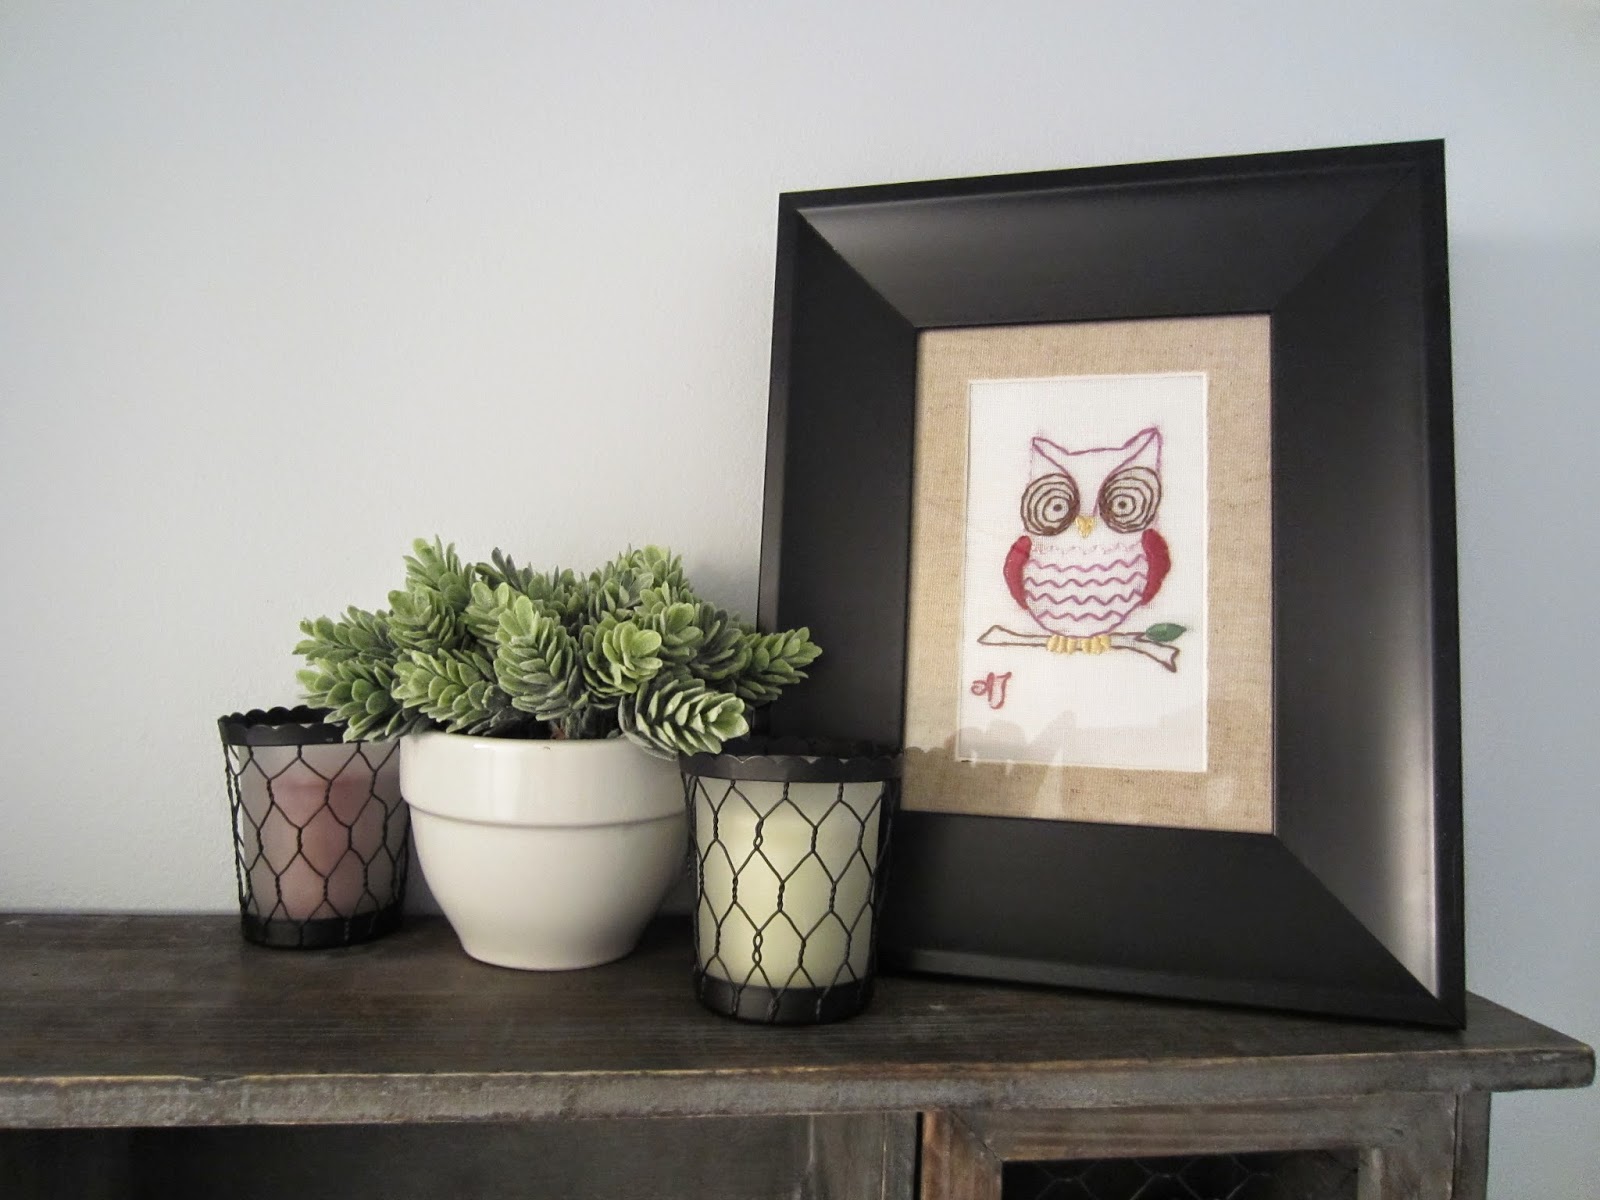
I added yet another succulent and some candles to the top as well as a framed embroidered owl that I quickly whipped up with some scraps from around the house (I am noticing there is a bit of an owl/succulent/votive candle theme to my decorating).


Isn't the owl cute?  I wanted to do his body blue (as you will see in the pattern below) but didn't have any blue embroidery thread so I made do with purple.  He still turned out pretty good though I'd say.

Here is the pattern I drew up:


I would say the easiest way to transpose this would be print off this black and white copy then put your fabric over the paper and trace it.


To frame I simply folded the fabric around a piece of cardboard to fit into my frame and taped the fabric down.  This little owl would be really cute on something like tea towels too (I may have to try that myself sometime).

Hope your weekend is lovely!

Thursday, 24 April 2014

Baby Rag Quilt Tutorial


This month I enjoyed making a rag quilt for my cousin and her husband's new baby boy.  I am so excited to have another baby in the family!  Rag quilts are quite easy to make, as far as quilts go.  This is a great project if you are looking for something that you can have done within an afternoon - or if you are looking for a simple beginner's project that will give great results.  I made this quilt to be a standard baby size of 3' by 4.5' out of 9" x 9" squares.  When I was looking for fabric, my local fabric store had fairly disappointing choices when it came to brushed cotton or flannelet.  I bought some plain light blue for the backing but continued to look for better options for the front.  I was struck by the genius idea to simply buy receiving blankets in nice patterns and cut them up to use as my fabric.  I found two different sets of Carter's receiving blankets with an elephant theme (which is what the baby's room is decorated with) at Target.

What you will need:
2 sets of  Carter's receiving blankets (4 blankets in each set) OR 6 different patterns of flannelet or brushed cotton fabric 30" x 30"
2 yds of solid color flannelet or brushed cotton fabric to match the above fabric
Quilt batting at least 3' x 4.5'
Co-ordinating thread
Sewing Machine
Sharp Scissors

Remember to preshrink the fabric by washing in hot water then drying on high!

1.  Cut 24 squares of 11" x 11" from both the front fabric (four squares from six of the blankets, or four squares from each pattern of the brushed cotton or flannelet fabric) and the back fabric.  You will need 48 squares total.


Now iron the fabric.

2.  Cut the quilt batting into 24 9" x 9" squares.

3.  Time to sew!  Sandwich a quilt batting square between a front fabric square and a back fabric square.  Sew two seams kitty-corner across the 3 pieces, forming an X with the batting in between the two pieces of fabric.


Repeat this step until you have 24 fabric and batting "sandwiches".

4.  Now it is time to lay the pattern out:

For my fabric, the colors correspond to:

Medium Gold = Yellow/White Large Polka Dots
Light Gold = Elephant and Giraffe Print
Medium Grey = Small Multicolor Polka Dots
Dark Grey = Grey/White Large Polka Dots
Light Blue = Blue/White stripes
Medium Blue = Blue/White Elephant Print


5.  Begin sewing the rows together.  You want to place the back sides of the sandwiches together and simply sew straight down the edge with a 1" seam allowance.  This is going to look questionable because you will have a rough edge sticking out on the front side of the quilt - trust me and just go with it.  I suggest being very careful with this step.  Old habits die hard and you will most likely try sewing the rough edge down and to the back - this is what I did a lot, and this is how I spent a lot of time:
Ripping stitches - the worst!


6.  Press out the rough edges so that they lay open and then sew the columns together the same way you did with the rows (also pressing open the rough edges of the columns).


7.  Now comes arguably the worst part, snipping the fringes.


Once the fringes are snipped, wash the blanket one final time (I use a gentle cycle) to rough the fringes up a little bit.  You are done!


As always, I welcome any questions or comments in the comments section below!

Tuesday, 22 April 2014

Tuesday Inspiration


In a little less than a week I am going to be another year older - 22.  That number seems strange to me.  In my mind I am the same 18 year old I was when Brett and I first met.  I don't feel four whole years older!  Lately life has seemed a little "blink and you'll miss it".  How is it that I am done term two of third year?  Celebrating another birthday?  Another seeding year is almost upon us?  Brett will be 25 this year!

I am probably more guilty than the average person of being preoccupied with the future.  I can frequently be heard talking about "Someday when _______ happens" or "Once I am finally done nursing school" or "When Brett and I start having kids".  I am starting to realise that maybe I should be spending more time enjoying today - it will truly be gone before I know it.

That isn't to say that dreams and big plans for the future need to be laid aside.  Something I pride myself on is my drive, my will to achieve my dreams.  But the future can't be all we live for after all.  Trace Adkins sings a song called "You're Gonna Miss This" (in case you haven't caught this by now I am a pretty big fan of country music).  The chorus goes like this:

You're gonna miss this,
You're gonna want this back.
You're gonna wish these days,
Hadn't gone by so fast.
These are some good times,
So take a good look around.
You may not know it now,
But you're gonna miss this.

I generally don't make New Year's resolutions, but this year I am going to make a "Birthday Resolution" (I'm not sure if that's a real thing, but just go with it).  I am going to start enjoying this time in our lives more.  And counting my blessings a little bit more, because we are truly blessed.  After all, this is the oldest I've been and the youngest I will ever be again, and that is something I should celebrate every day.

I hope you are all having a lovely week!

Saturday, 19 April 2014

The Trials and Tribulations of Zone Three Gardening

Yes, that title might seem a tad melodramatic - but currently my frustration with our growing zone knows no bounds.  I must admit, I have the slightest obsession with hydrangea bushes at the minute.  Aren't these just the most lovely things you've ever seen:

Source
Sadly for those of us in Zone 3, the hydrangea is a virtually unattainable dream as it is recommended for Zone 8 and up (possibly 5b if you are lucky).  If, by some miracle, you have found a variety of hydrangea that can survive the temperature extremes of Zone 3, please leave a comment for me.

If you aren't sure what I am talking about regarding this "growing zone" situation, here is a map (for those of us in Canada, just follow the average temperature key at the bottom):

Source
Though I am sad that I cannot grow hydrangeas, I do have a few favorite perennials that grow in our zone of crazy weather.

1.  Common purple lilac.  I don't think anything beats the smell or color of lilacs in full bloom.

Me with my mom's lilacs in Grade 12 - this feels like a million years ago!
2.  Potentilla.  These compact shrubs grow wonderfully in zone 3 and are very hardy (even resistant to deer).  I am planning on planting these underneath our south facing picture window as soon as it is warm enough to plant.

Source
3.  Lily of the valley is one of my favorite perennials - also one of my favorite wedding flowers!

Source

4.  Peonies are another favorite perennial and favorite wedding flower.  They might be the one flower that can beat lilac in the scent department - in my opinion.

Source

5.  Roses might be last but they definitely aren't least.  I have shared this picture before but it really is one of my favorites.  I love these roses that we inherited from Brett's grandparents when we bought their house.


Do you have any zone 3 gardening tips?  Or general gardening tips?  I would love to hear them in the comments section!

Thursday, 17 April 2014

Learning the Truth About Dating a Farmer

This will be Part IV of the "Our Love Story" series that I have been doing.  If you would like to check out the other parts, follow these links:

Brett and I on one of our "dates" on the seeder.

By the time spring rolled around, Brett and I had been dating for eight whole months.  At this point, I pretty much knew this was it, he was the one who I was going to spend the rest of my life with.  But spring as a farmer - or as a farmer's girlfriend (or fiance or wife) - brings about a whole new set of challenges.  It was time for me to experience the insanity of seeding.

Our beautiful Case iH tractor and seeder.


I grew up on a farm.  It started as a grain farm, but when I was about 5 years old my parents seeded their land to alfalfa and started a business making hay bales for cows and horses.  I saw how hard both my mom and dad worked to keep the family farm running.  It was endless amounts of time and labour, day in and day out - as it is on all farms.  I knew all about how hard farmers worked, but I am not sure I truly understood it until I experienced it first hand with Brett.  I truly can't imagine having grown up in a city, to then fall in love with a farmer - what a learning curve that would be.  I at least had some forewarning of what I was getting myself into and I have a lot of respect for women who grew up in the city who then go on to marry farmers.

These words from a famous speech by Paul Harvey had never rang so true for me:

"And who, in planting time and harvest season, will finish his forty-hour week by Tuesday noon, then, paining from 'tractor back', put in another seventy-two hours.  So God made a farmer."

I had gained a new found respect for not only Brett, but both of my parents.  The thing about seeding is, you put in days and weeks of sweat and labour into planting your fields without knowing whether the crop will survive, whether you will get enough rain, whether you will even be able to sell the grain or not.  It takes amazing fortitude, perseverance, and sometimes simply a strong stubborn will to go through that without the guarantee of a payday at the end of it all.

As it turns out, what could have easily torn our relationship apart - thanks to months of only getting to see Brett when I rode shotgun in any number of different pieces of farm equipment, and having him be grumpy from lack of sleep or stress about the weather - was the very thing that made me fall even more in love with him.  They often say that a woman marries her father.  Seeing Brett in action on the farm made me see a little piece of both of my parents in him.  They and he share a love of the land, and a great willingness to go the extra mile to see their family legacy survive - even against all odds.  This was - and is - always something that I held great respect and love for my parents for, and now something that I also respect and love Brett for.

They say when you marry a man, you marry his family.  I'd like to add to that: when you marry a farmer, you also marry his farm.


Tuesday, 15 April 2014

Mother's Day Gift Inspiration

Mother's Day will be here soon so I thought I would put together some favorite gift ideas.


Clockwise, starting from top left:

1.  I absolutely love my Pandora charm bracelet and both my mom and mother-in-law love theirs as well.  Charms for their bracelets are always a safe gift and Pandora has a ton of options.  I am loving the Mother's Day collection, which you can find here.

2.  I read the Jennifer Weiner book "Little Earthquakes" a while ago now and even though I am not yet a mom myself, I absolutely loved it.  I think that this book would speak to moms of all ages.  You can find it on amazon here or at your local bookstore (I actually think I got my copy at Extra Foods).

3.  Light, spring weight scarves are a wonderful accessory to dress up a plain T-shirt.  I love this light weight mint one from Indigo.

4.  No one does jewelry like Tiffany & Co.  This Elsa Peretti Open Heart necklace would be a lovely addition to anyone's jewlery collection.

5.  Chocolates are sure to please any mom.  These white chocolate lemon truffles from Indigo are delicious.

Saturday, 12 April 2014

Lemon Meringue Pie Recipe and Tutorial


Until recently, my pie making mostly stayed in the area of apple and peach.  I decided to try my hand at lemon meringue, since it is arguably one of my favorite types of pie.  I think I have finally perfected my recipe for both the pie pastry and lemon pie filling.  Since lemon meringue pie is the perfect dessert for an Easter supper, I figured I would share my recipe with you here.

We will start with the pastry first.  Because we are just making an empty shell with no top crust, you must make a half recipe of the below:


Next, lay down some saran wrap strips onto your cupboard and heavily flour them.  This step is very important.  This pastry recipe is perfect because it makes a perfectly flaky crust - but it likely will not come off of your counter top in one piece without the help of saran wrap.


Pick up the pastry circle and lay it saran wrap side up int he pie plate.  Remove the saran wrap, cut of the excess around the edge and perforate the bottom with a fork:


Now bake the shell at 450°F for 15mins.  Turn the heat down to 350°F and bake for an additional 15mins.  Keep careful watch to make sure that the crust does not burn - all ovens cook differently after all.

We will move onto the filling now.  As an aside, I suggest you use a wooden spoon to make the filling.  I don't know why, but it works so much better than anything else.


1.  Mix together cornstarch, sugar and salt into a 2qt saucepan.  Separate the eggs, placing the yolks into a small bowl (keep this near the stove while you make the sauce) and placing the whites into a larger bowl (I used my KitchenAid stand mixer for this).

2.  Stir in water, lemon juice, mango juice and lemon peel.  Cook this over medium heat, stirring constantly until the mixture boils - remove it from heat.
       It will go through 3 stages during this time:
              1 - thin liquid
              2 - thin liquid with thicker lumps
              3 - thick, shiny sauce (this is when it is boiling and done)


3.  Add a couple of spoonfuls of the hot lemon sauce to the small bowl of egg yolks, stirring rapidly to prevent clumping (this is done to bring the egg yolks up to the same temperature of the sauce).


4.  Add the yolk mixture to the hot lemon sauce - stirring rapidly to prevent clumping.  Return to heat, stirring until mixture is thick and shiny again.  Add butter or margarine to the thickened sauce, stirring until melted.  Remove from heat.

5.  Pour mixture into pie crust.  You won't fill the crust completely, as the rest will be filled with the meringue.  Preheat oven to 400°F.


Lastly we make the meringue.  You can use either a stand mixer or hand mixer for this.  I find that a stand mixer works best.


1.  Beat eggs at high speed with wire whisk attachment until soft peaks form.


2.  Add sugar, 2 TBSP at a time, while beating on high.  Continue beating until sugar is dissolved (rub some meringue between your fingers, it should be smooth not gritty) and whites form stiff glossy peaks.


3.  Spread meringue onto pie, making swirls with your spatula for an attractive top.


Bake for 10mins at 400°F.  Allow to cool at room temperature for at least 30mins away from drafts (I prefer to do 1hr).  Cooling at room temperature stops the filling from getting thin and soupy (I learned this from experience).

You are done!  I hope you enjoy your pie!